A Step-By-Step Guide to Editing Great Videos
Video making is easy, but you need to follow a step-by-step procedure for video editing. This is not a very technical job, and you don’t need expert or professional training to edit and import.
But video editing is no child’s play as well. There are tips and tricks for doing it right so that your videos come out with the best storytelling imbibing the right technology in front of your viewers.
Video editing can be easily done using an effective video maker or a sound online video editor. You need to know about the fundamentals of video editing and become a pro at it, as more and more people are spending more time watching videos than reading.
So, if you want to interact with your audience, create trust, enhance your credibility, and reach a maximum number of people, make sure your video editing is sharp and concise.
Don’t be hassled in the beginning! Every project is different, but you can follow these fundamental steps to stay concentrated and form the project structure.
Pre-requisites for Video Editing
Before starting with editing, consider these basics that you should be ready with. These are your pre-requisites:
Check the Preview Media and See Which One You Can Use
Excluding content that you don’t in your video can be time-saving while importing materials.
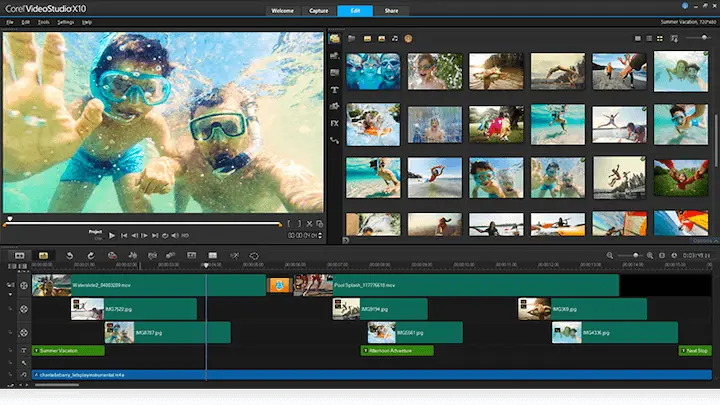
Good video editing programs are well-equipped with transitions, effects, image stabilization, and amazing color correction tools that can help with erratic videos and help videos that don’t have their visuals properly procured.
Plan Your Video Editing
If you want to create a spectacular video, you must create a story with an informative beginning, middle, and conclusion. Plan and decide the flow of your story when editing.
You must keep in purview how you want your video to look when you have finished editing and then follow your plans. Keep your text, sound, graphics, and transitions consistent. Making a decent plan can resolve many problems!
Rough Cut
You must orderly arrange all the video clips you have imported from your device and configure how each clip should be combined. If something doesn’t look right, you must change it.
Don’t be lazy while editing videos. It’s easier to add a lot and retrieve it later than using a little and then looking for stuff to add to it. Cutting and trimming are much easier than adding and shuffling.
Time to Edit
When you are ready with the rough version of the video clips, you must begin the editing procedure following the step-by-step given in the next section.
Trim the clips, add transitions, and make changes to make your video look good. You can straight cut the transitions and sequence the clips to move in transitions, scenes, or segments. Don’t overdo the editing, as it may dissuade the viewer.
Transition
Once you’ve got the flow of the edited video the way you want, add effects, graphics, titles, color, descriptions, music, and other details. Remember that you should all of these to the story to work on the points you’re trying to create throughout the video.
You need to use your creative skills here and change the sequencing or color combination according to your preference and choice.
Delivery and Sharing
This is the final step, called exporting. Once you are done with the video editing, you must deliver the video. You can share your video or post it on social media to stream it. You can create a DVD and send it to someone.
Different types of sharing platforms are available, and you need to decide how to share using editing programs that make it easy for you through templates. Many offer a massive range of formats and built-in templates for specific purposes. Select the one that matches the video properties, and it will suit the way your video is displayed.
Step-by-Step Process to Edit Videos
Let us now look at the step-by-step procedure required to edit videos:
Step 1 – Plan
This may not be the fun part, but before you start, you must have a concrete plan ready to decide your goal, what you want to make a video about, what audience you are targeting, and how you want to go about it. Then start editing.
Step 2 – Record the Project
Start with production. Make sure the script is followed. If there is any discrepancy in your plan for making the video clips, you can fulfill it now.
You can cover all minute details and make a collection of small video clips, which you can easily use later while editing.
Step 3 – Import the Media
Once you are through with the video-making and production process, you must import the rough draft from your camera to your editing system.
Step 4 – Organize the Media
First, you need to make three copies of the imported video following the 321 rule. Name the files of the recordings you want to keep and the recordings you want to delete.
You don’t have to use everything you shoot, but you must effectively organize the media before you discard anything.
Step 5 – Edit the Story
This is the process of incorporating shots into a “project” so that the story emerges in the right order and when needed. Sequence the video clips in an affective order to form an engaging story
Step 6 – Trim the Story
Cut what you don’t need and trim when you need to match two clips, making the transition from one video clip to another very smooth.
Step 7 – Add a Transition
You can use transitions in three ways- cut, dissolve, and wipe. All these three features have varied emotions and are used for different objectives.
You can add the transitions when your video trimming is complete.
Step 8 – Add Effects
Graphics, animations, and effects are the fun part of video editing. These enhance your story and make your video look perfect.
The main purpose of adding effects is to lure the audience, but you must not overdo it. Otherwise, the span of focus may waiver.
Step 9 – Sound Mixing
Your video is incomplete without sound. You must improve the quality of the speech, voice, or background score of the video.
You can also use royalty-free music to instantly add to your video that connects with the audience.
Step 10 – Work on the Final Touches
Before you reach the final step, you must give the edited video a final brush-up or touch-up.
Fix color issues add text if required, work on titles and descriptions and complete the video.
Step 11 – Final Output
When you are convinced that the edited video looks how you wanted it to be, you must save all the media and output the project.
You can share it on multiple platforms and garner praises for your efforts.
Conclusion
It may sound like a difficult process, but video editing is easy. Once you work on a few projects, you will gain experience.
Video editing is for your if you love making videos and you have hours of footage that you want to turn into an exciting video for your friends and family. All you require is an easy-to-use video editing software, some fundamental skills, and the keenness to experiment, experience, and create great videos right away.


